
Anna Potatoes
An incredibly simple but extremely tasty cousin to Scalloped Potatoes, Anna Potatoes is a classic French Potato dish. It has all the butteriness of creamy Mashed Potatoes with a whole lot of extra Butter, yummy.
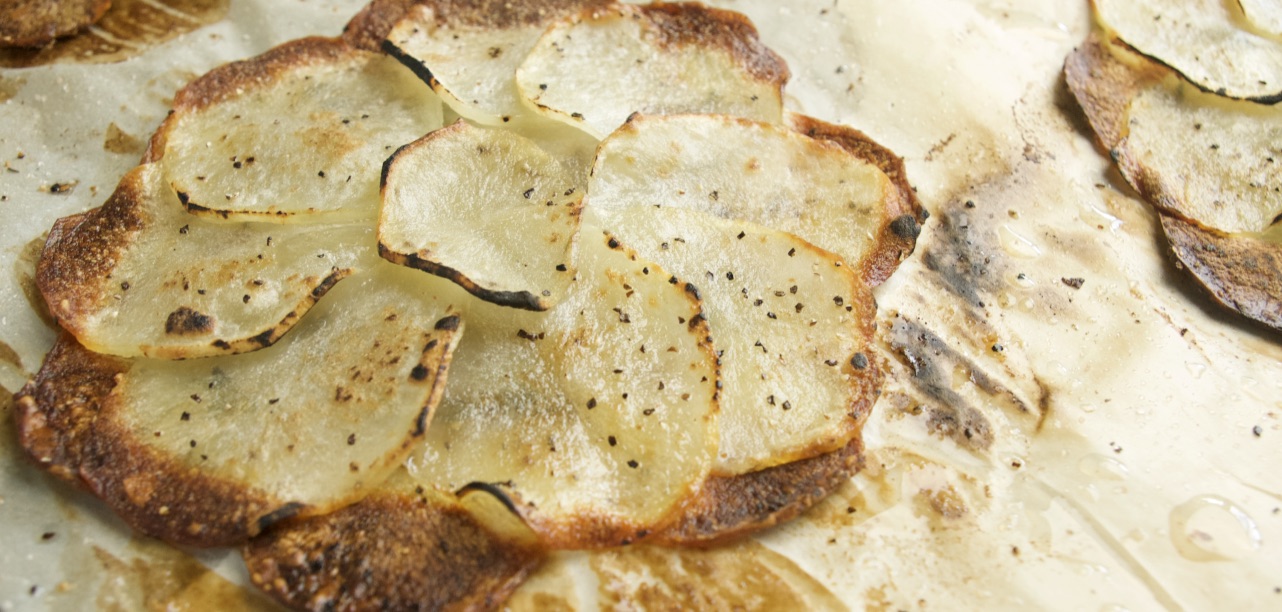
As simple as Anna Potatoes is, there are a couple of different ways to assemble them. Possibly the simplest is a couple of layers on a baking sheet. Start with a single Potato slice in the middle, create a circle by layering one slice over another. The last slice of the rosette gets tucked under the first slice, making a flower-like shape.

Butter, Butter and more Butter
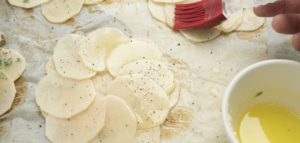
Brush on a nice layer of Butter, a pinch of Salt and Pepper, maybe some Herbs and repeat with another layer of Potato. A final layer of Butter, Salt and Pepper and into the oven. 425°F, rack in the middle of the oven for 20 – 30 minutes.

You are looking for the edges to get very crispy like a dark brown Potato chip. They’re finished cooking in my oven at 30 minutes but yours might vary so start checking after 25 minutes. They will go from crisp to burnt very quickly.

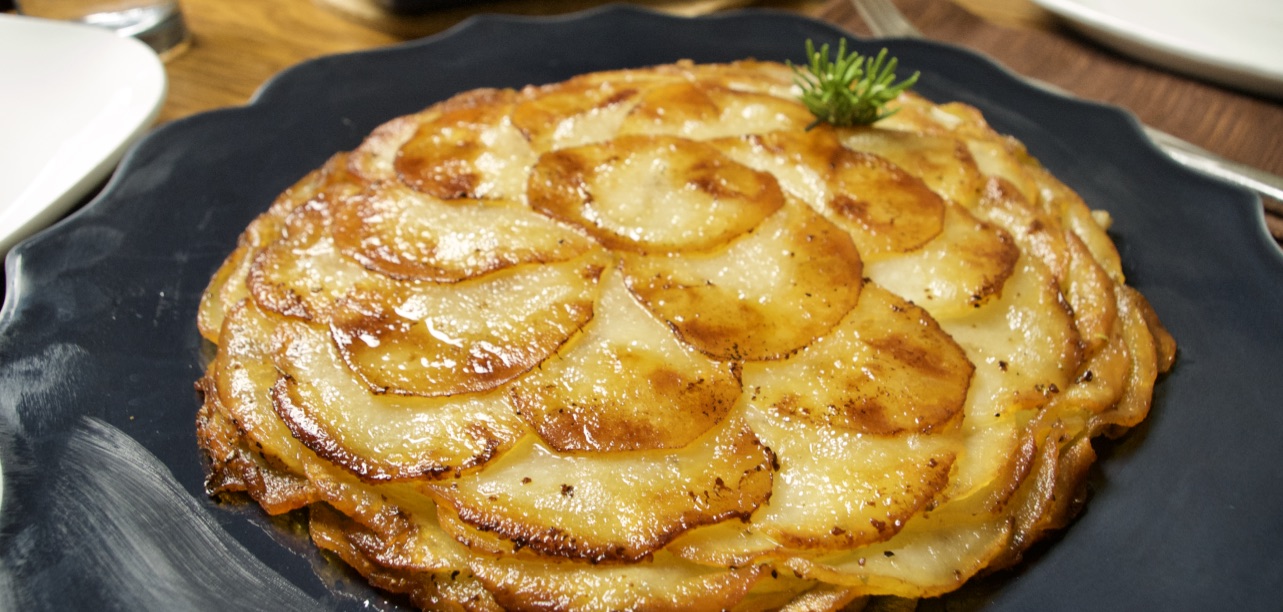
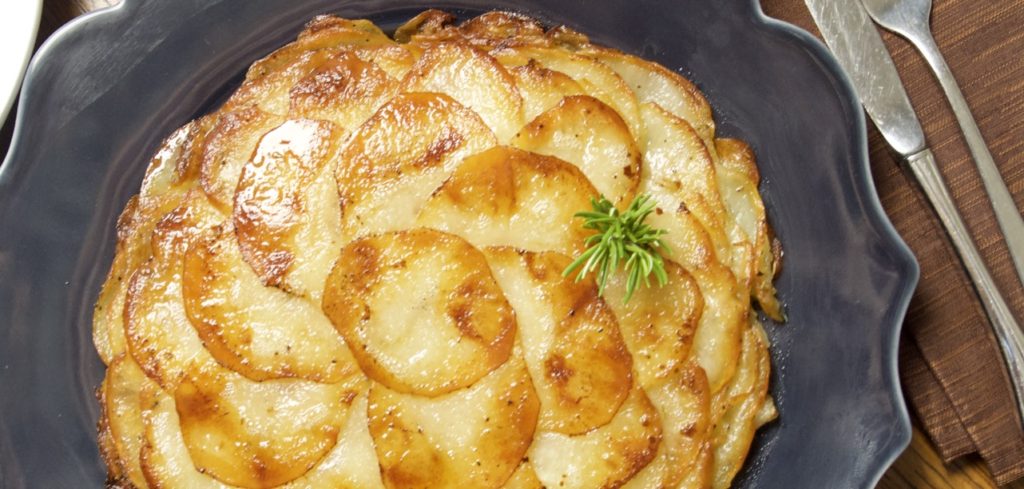
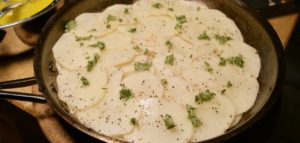
The classic Anna Potato
The second method is in a frying pan… here we make Anna Potatoes which is a much thicker and more Buttery version of Scalloped Potatoes.
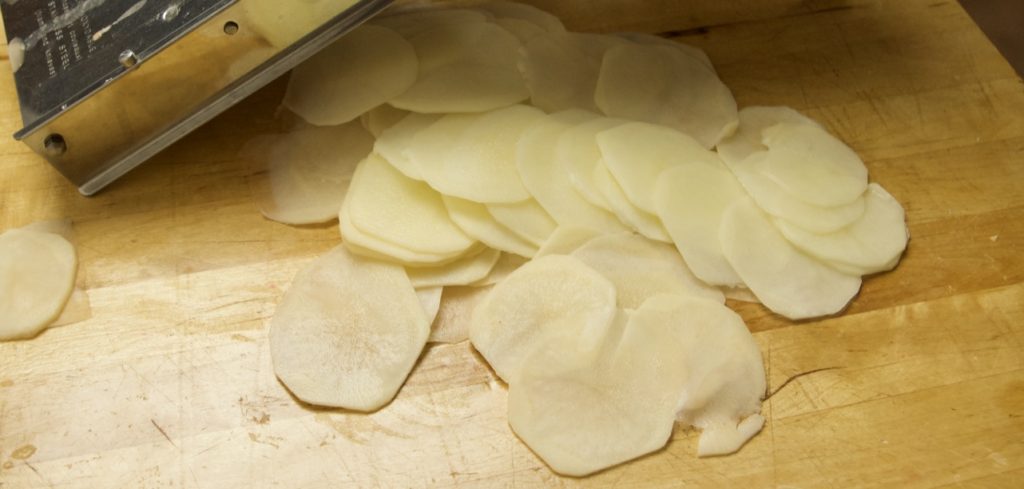
The first thing all good Anna Potatoes or Scalloped Potatoes start with is nice evenly cut Potato. The reason we want evenly cut Potato is so everything cooks at the same rate. The best way to accomplish this is with a mandolin but if you don’t have one use a sharp knife and do your best.
Making Anna Potatoes starts the same as the sheet pan method with a couple of steps.
1) Start with melting 1/4 cup of Butter in a frying pan.
2) Remove the fry pan from the heat.
3) Starting with a single slice in the middle of the pan make a circle around, layering the Potato as you go.
4) Continue to layer all the way to the edge of the Pan.
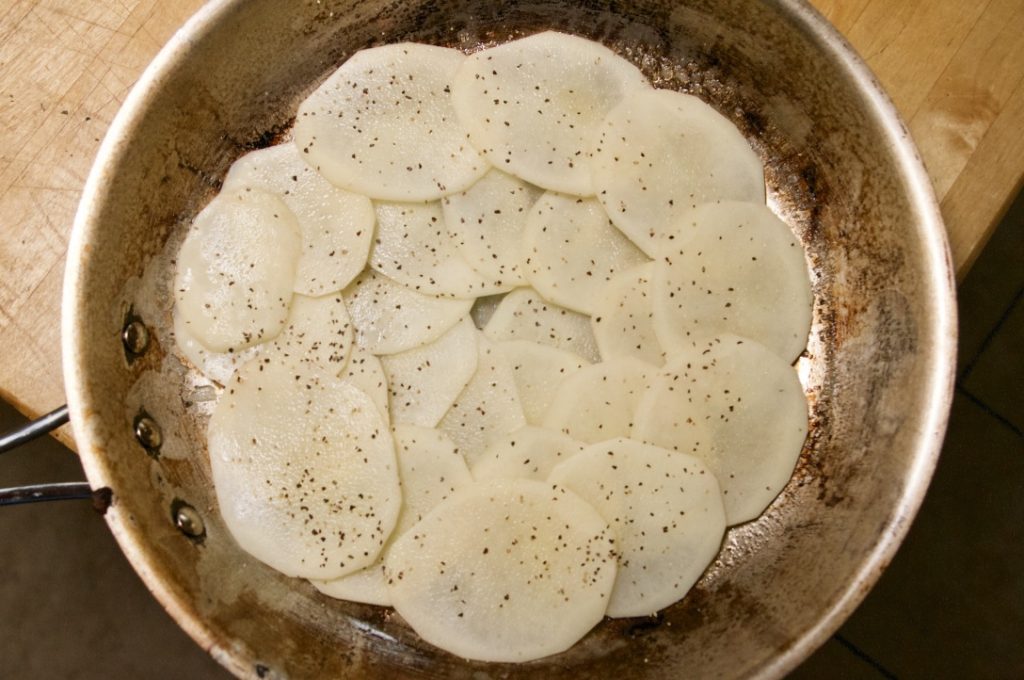
5) Salt and Pepper over the top of the Potato then ladle or brush with more Butter.
6) Repeat with another layer of Potato, Salt and Pepper and Butter. Continue until you reach the top of the pan or run out of Potato. Make sure to Butter, Salt, and Pepper after each layer.

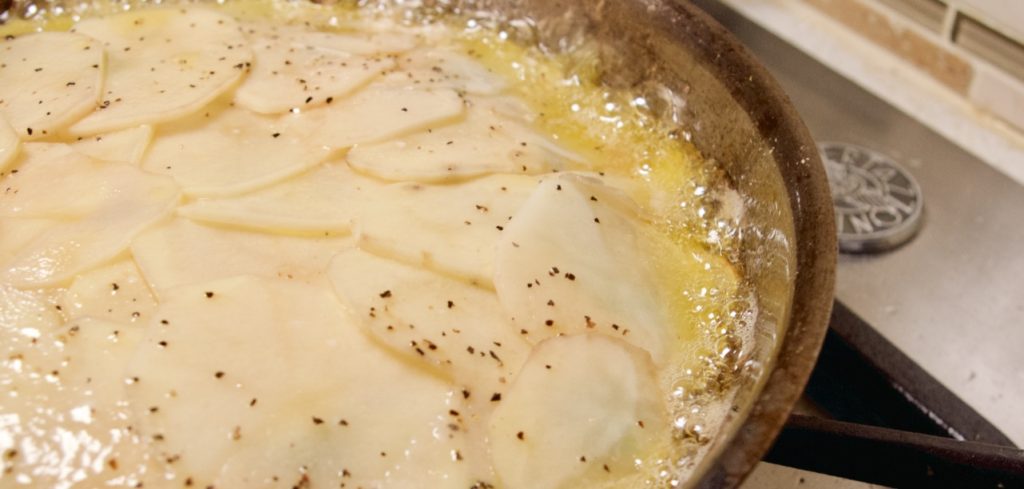
7) On the heat with the pan until the Butter starts to bubble. Give the pan a jiggle to make sure the Potatoes aren’t stuck to the pan before you put it in the oven.
8) Cover with foil, in the oven at 450°F for 40 minutes. Remove foil and cook for another 10 minutes.
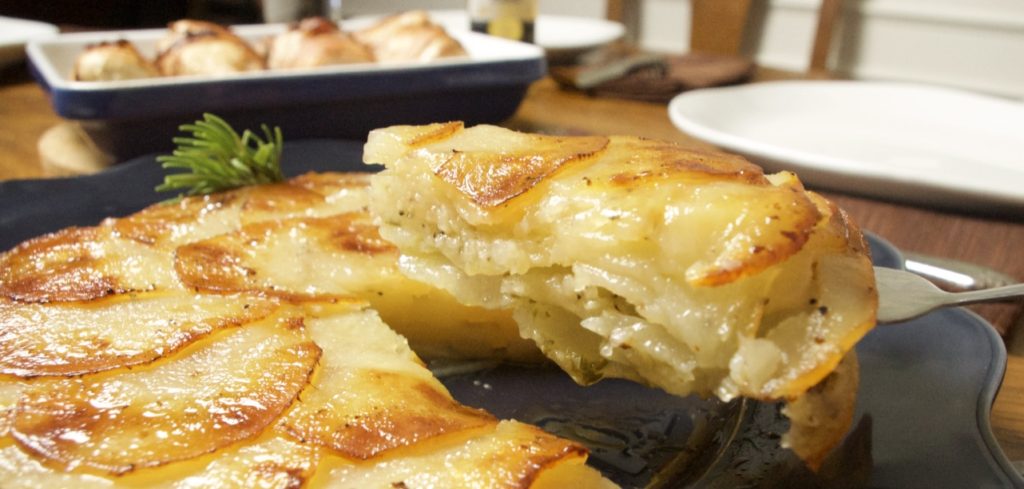
9) Remove from the oven and let cool slightly. Drain the excess Butter from the pan. Using a large metal spatula lift the pan and tilt over a bowl holding the Potatoes with the spatula.
10) Jiggle the pan to make sure the Potatoes are loose. Place a platter upside down over the Potatoes, holding the platter firm to the pan flip it over. Jiggle the pan again to make sure the Potato releases and lift off to witness the Buttery golden wonder.
Ways to up the Anna Potatoes profile
The basics of Anna Potato are Potatoes, Butter, Salt, and Pepper but there are ways to up the ante. In between the layers is a world of opportunity to add some more flavour.
For my Anna Potatoes, I took 6 – 7 cloves of Garlic and crushed them onto a cutting board. Added 1 – 2 Tbsp of chopped Rosemary and using the back of my knife crushed the two together into a mash. I then spread the mash in between the Potato layers.
The Garlic and Rosemary add a great aromatic addition to the Anna Potatoes. After the Anna Potatoes hits the platter and is at the table slice it like you would an Apple Pie. Serve it up with some Kid friendly Cordon Bleu and… Enjoy!
Anna Potatoes, sheet pan version
Equipment
- Baking Sheet
- Parchment Paper
- Pastry Brush
Ingredients
- 1 large Russet Potato
- ¼ cup Butter melted
- Salt & Pepper
Instructions
- Peel the Potato, melt the Butter and turn the oven to 425°F. move the rack to the middle.
- Preferably using a mandolin, slice the Potato between an 1/8" and 1/16" thick… If you don't plan on getting the tape measure out, not so thin you can see through it but not so thick you can't easily layer the slices.
- Make 4 rosettes on one sheet pan, on the parchment paper place a single Potato slice down. Make sure to leave room around the sheet pan to build 3 more.
- Start by making a Potato ring around the single slice, overlapping the slices as you go. When you reach the final slice tuck it under the first slice so you can't tell where you started and where you finished.

- Sprinkle a pinch of Salt & Pepper over the top, brush a generous layer of Butter over, and if adding any Herbs, Garlic or Spices place over the top.
- Repeat with a second layer of Potato, but when starting the second layer have it extend slightly beyond the first layer.
- Salt & Pepper and Butter again but don't add any herbs to the top layer, they will just burn under the high heat.
- In the oven, middle rack, for 20 – 30 minutes, the edges will get crispy and brown and the layered parts will stay softer and Buttery.
- Use as a decorative base on the plate to build up from, like in the BBQ Lemon and Herb Trout recipe…Enjoy!

Notes
Anna Potato. classic version
Equipment
- Sheet Pan
- Parchment Paper
- Pastry Brush
Ingredients
- 3-5 large Russet Potato the amount depends upon how think you want to make it, but 3 is the minimum.
- 200-320 g Butter melted, 60g of Butter per Potato
- Salt & Pepper
- 6-8 cloves Garlic crushed and puréed with the side of a knife
- Herbs, Spices etc. Rosemary, Thyme, Garlic powder Onion Powder etc.
Instructions
- Peel the Potato, Turn the oven to 425°F
- Preferably using a mandolin, slice the Potato between an 1/8" and 1/16" thick… If you don't plan on getting the tape measure out, not so thin you can see through it but not so thick you can't easily layer the slices.
- Place the pan over low heat on the cooktop and melt 1/4 cup of Butter. As soon as Butter is melted turn heat off and remove from the heat.
- Let the Butter cool slightly so you don't burn yourself. Start in the centre with a single slice of Potato. Over lapping each slice work your way to the edge of the pan.
- After you have created one layer sprinkle Salt and Pepper and any Herbs or Seasonings over the top, ladle or spoon Butter over the top.

- Repeat with another layer of Potato slices, starting in the middle and working your way out in the opposite direction from the previous layer.
- Top again with Salt, Pepper, any Herbs or Spices you're using and more Butter to coat. ( I used puréed Garlic and Rosemary inside mine ).
- Continue to do this until all the Potato is used up. Depending upon the size of your pan this may lead to the Potatoes higher than the top of the pan but they will shrink as they cook.
- Make sure to only Salt and Pepper the top, no Herbs or Spice, and use up the rest of the Butter.
- Place the pan back on the cooktop on medium heat and heat up until the Butter is bubbling around the edges.

- Give the pan a good wiggle to make sure the Potatoes haven't stuck to the bottom of the pan.
- Cover the Potatoes with aluminum or lid, and place in oven for 40 minutes. After 40 minutes remove the Foil and cook for another 10 minutes.
- Remove from the oven and set aside to cool for 10 – 15 minutes.
- There is a lot of Butter so will have to remove the excess. I found holding the potatoes in place by lightly pressing down on them with a large metal spatula worked best.
- Start by gently tilting the pan to one side and letting the butter flow down. Still pressing with the spatula lift and pour the Butter into a reserve bowl.
- Next is removing the Anna Potatoes from the pan. Start by wiggling the pan again to make sure the Potatoes are loose.
- Preferably using a serving platter larger then the pan ( use the back of a sheet pan if there is nothing else available ) place it top side down over the pan. Holding the platter with one hand, in one motion flip the pan and platter so the platter is on the bottom now.
- Gently lift the pan off the platter to reveal beautiful Anna Potatoes. Grab a knife, slice it like a pie and…Enjoy!